警告
本文最后更新于 2024-05-18,文中内容可能已过时。
Javascript 面向对象(OOP)
语法
1
2
3
4
5
|
class 类名 {
    constructor(){

    }
}
|
举例:
 1
 2
 3
 4
 5
 6
 7
 8
 9
10
11
|
//Person类专门用来创建人的对象
class Person {
    constructor(name,age,hooby){
        this.name = name;
        this.age = age;
        this.hooby = hooby;
    }
}
//调用构造函数创建对象创建对象
const xiaoming = new Person("xiaoming",18,'programming');
console.log(xiaoming)
|

instanceOf用法
可以用来检查一个对象是否是由某个类创建,如果某个对象是由某个类创建,那么我们称这个对象是这个类的实例
 1
 2
 3
 4
 5
 6
 7
 8
 9
10
11
12
13
14
15
16
|
//Person类专门用来创建人的对象
class Person {
    constructor(name,age,hooby){
        this.name = name;
        this.age = age;
        this.hooby = hooby;
    }
}
class Dog {

}
//调用构造函数创建对象创建对象
const xiaoming = new Person("xiaoming",18,'programming');
const dog1 = new Dog();
console.log(xiaoming instanceof Person); //true
console.log(dog1 instanceof Person); //false
|

属性
 1
 2
 3
 4
 5
 6
 7
 8
 9
10
11
|
//Person类专门用来创建人的对象
class Person {
    //在类中写属性,每次创建对象,它都会带有这些实例属性
    //实例属性只能通过实例访问
    name = "meowrian";
    age = 17;
    hobby = "game"
}
const meowrain = new Person();
console.log(meowrain);
console.log(meowrain.name,meowrain.age,meowrain.hobby);
|

静态属性
1
2
3
4
5
6
7
|
//Person类专门用来创建人的对象
class Person {
    //静态属性只能通过类名去访问
    static test = "test静态属性";
}
const meowrain = new Person();
console.log(Person.test);
|
方法
 1
 2
 3
 4
 5
 6
 7
 8
 9
10
|
//Person类专门用来创建人的对象
class Person {
    name = "meowrain";
    sayHello = ()=>{
        console.log("Hello~");
    }
}
const p1 = new Person();
console.log(p1)
p1.sayHello();
|
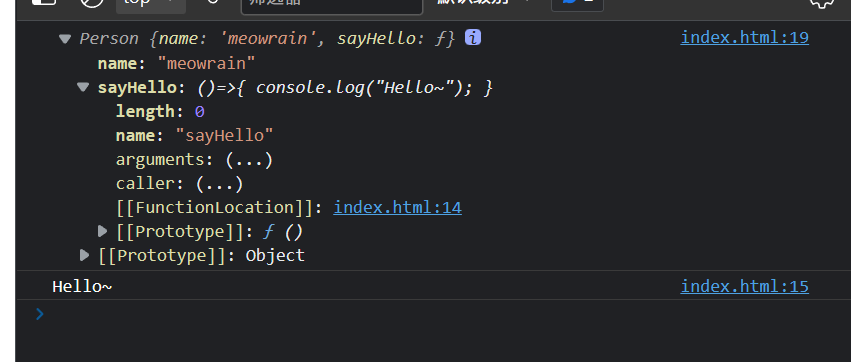
两种添加方法的方式:
 1
 2
 3
 4
 5
 6
 7
 8
 9
10
11
12
13
14
|
class Person {
    name = "meowrain";
    sayHello = ()=>{
        console.log("Hello~");
    }
    sayGoodbye(){
        console.log("Goodbye~");
    } //这种方式直接打印实例对象看不到这个方法

}
const p1 = new Person();
console.log(p1)
p1.sayHello();
p1.sayGoodbye();
|

静态方法(类方法)
1
2
3
4
5
6
7
|
//Person类专门用来创建人的对象
class Person {
    static sayGG = ()=>{
        console.log("GG~",this);//静态方法中,this指向的是我们的当前类
    }
}
console.log(Person.sayGG()); //只能通过类名来调用
|
构造函数
 1
 2
 3
 4
 5
 6
 7
 8
 9
10
11
12
13
14
|
class Person {
    //在类中添加一个特殊的方法constructor
    //该方法我们称为构造函数
    //构造函数会在我们调用类创建对象时候执行
    constructor(name, age, gender) {
        this.name = name;
        this.age = age;
        this.gender = gender;
        console.log("构造函数执行了");
    }
}
const p1 = new Person("meowrian", 18, "男"); //调用类创建一次对象
const p2 = new Person("meow", 10, "男"); //调用类创建一次对象
console.log(p1.name);
|

封装
 1
 2
 3
 4
 5
 6
 7
 8
 9
10
11
12
13
14
15
16
17
18
19
20
21
22
23
24
25
26
27
28
29
30
31
32
33
34
35
36
37
38
39
40
41
42
43
44
45
46
47
48
49
50
51
52
53
54
55
56
57
58
59
60
61
62
63
|
//1. 封装
// - 对象就是一个用来存储不同属性的容器
//对象不仅负责属性,还要负责数据的安全
//直接添加到对象中的属性并不安全,因为它们可以被任意修改
// 如何确保数据安全
//提供setter和getter方法,来开放我们对数据的操作

/*实现封装的方式
    * 1. 属性私有化 #
    * 通过getter和setter方法来操作属性
    * get 属性名(){
    *   return this.#属性名;
    * }
    * set 属性名(value){
    *   this._属性名 = value;
    * }
    * */
class Person {
    //用#表示是私有属性 private,只能在类的内部访问
    #name;
    #age;
    #gender;

    constructor(name, age, gender) {
        this.#name = name;
        this.#age = age;
        this.#gender = gender;
        this._name = name;
        this._age = age;
        this._gender = gender;
    }

    //getter方法,用来读取属性
    get name() {
        return this.#name;
    } //这样写getter方法,在访问的时候直接用 实例.属性名就能获得
    get age() {
        return this.#age;
    }

    get gender() {
        return this.#gender;
    }

    //setter方法,用来设置属性

    set name(value) {
        this._name = value;
    }

    set age(value) {
        this._age = value;
    }

    set gender(value) {
        this._gender = value;
    }
}

const p1 = new Person("meow", 17, "男");
console.log(p1.name, p1.age, p1.gender); //这些都是调用的getter方法
p1.name = "meowmeow"; //这里调用的是上面的setter方法
console.log(p1.name);
|
多态
 1
 2
 3
 4
 5
 6
 7
 8
 9
10
11
12
13
14
15
16
17
18
19
20
21
22
23
24
25
26
27
28
29
30
31
32
33
34
35
36
37
38
39
40
|
//多态
/*
    * 在JS中不会检查参数的类型,所以这就意味着任何数据都可以作为参数传递
    * 要调用某个函数,无需指定的类型,只需要对象满足某些条件计即可
    *
    * */
class Person {
    constructor(name) {
        this.name = name;
    }
}

class Dog {
    constructor(name) {
        this.name = name;
    }
}
class  Test {

}

const dog = new Dog('旺财');
const person = new Person("喵雨");
const test = new Test();
// console.log(dog);
// console.log(person);
/*定义一个函数,这个函数将会接受一个对象作为参数,可以输出hello,并且打印name属性*/
const sayHello = (obj)=> {
    if (obj.name == undefined) {
        console.log("没有name属性,hello毛呢")
    } else if(obj instanceof Person){
        console.log("Hello 人:" + obj.name);
    }else {
        console.log("Hello "+ obj.name);
    }
}

sayHello(dog);
sayHello(person);
sayHello(test);
|
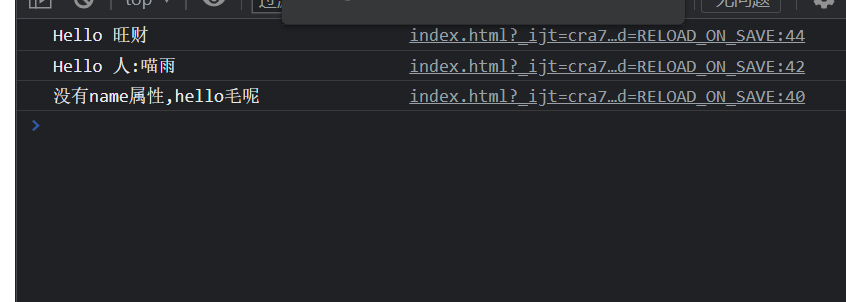
继承
 1
 2
 3
 4
 5
 6
 7
 8
 9
10
11
12
13
14
15
16
17
18
19
20
21
22
23
24
25
26
27
28
29
30
31
32
33
34
|
class Animal {
    constructor(name) {
        this.name = name;
    }

    sayHello() {
        console.log("Animal")
    }
}
class Dog extends Animal{
    constructor(name) {
        super(name);
    }

    sayHello() {
        console.log("旺")
    } //重写父类方法

}

class Cat extends Animal{
    constructor(name) {
        super(name);
    }

    sayHello() {
        console.log("meow")
    }
}

const dog = new Dog("旺财");
const cat = new Cat("汤姆");
dog.sayHello();
cat.sayHello();
|

对象的结构
对象中存储属性的区域实际有两个:
-
对象自身
- 直接通过对象添加的属性,位于对象自身中
- 在类中通过x = y的形式添加的属性,位于对象自身中
-
 1
 2
 3
 4
 5
 6
 7
 8
 9
10
11
|
class Person {
    name = "meowrian"
    age = 18
    fun = ()=>{
        console.log('ffff');
    }
    constructor(hobby) {
        this.hobby = hobby
    }
}
const p = new Person("打篮球");
|
-
原型对象(prototype)
-
对象中还有一些内容,会存储在其他的对象里(原型对象)
-
在对象中会有一个属性用来存储原型对象,这个属性叫做 __proto__
-
 1
 2
 3
 4
 5
 6
 7
 8
 9
10
|
class Person {
    fun(){
        console.log("hello")
    } //添加到原型中
    constructor(hobby) {
        this.hobby = hobby
    }
}
const p = new Person("打篮球");
console.log(p)
|
-
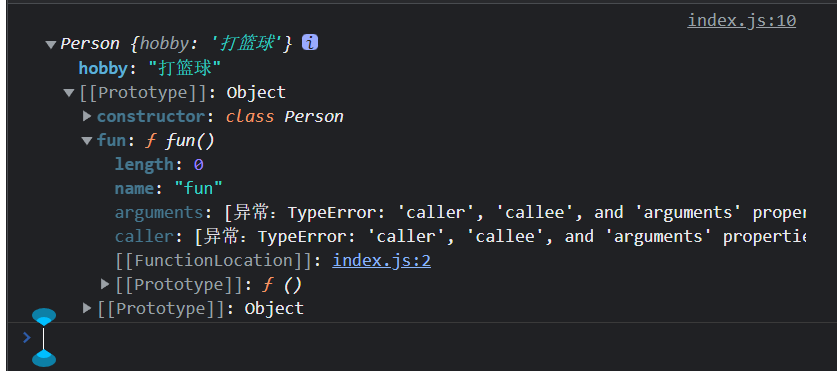
-
会添加到原型对象中的情况:
- 在类中通过
xxx(){}方式添加的方法,位于原型中
- 主动向原型中添加的属性和方法

原型
相关链接:__proto__和prototype的区别
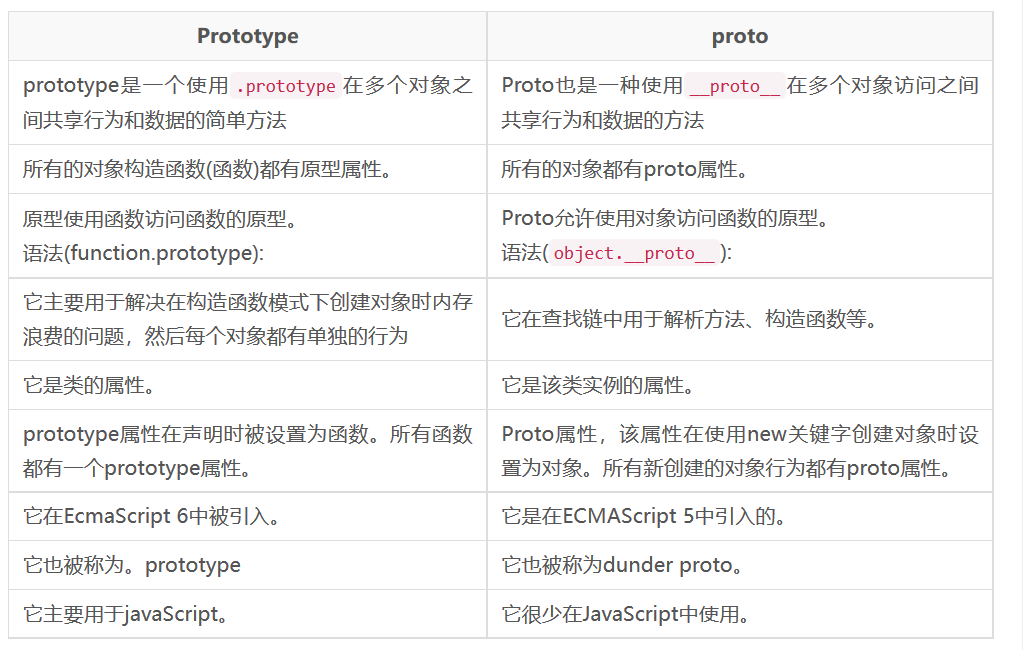
__proto__
 1
 2
 3
 4
 5
 6
 7
 8
 9
10
11
12
13
14
|
class Person {
    name = "meowrain"
    sayHello(){kde ubuntu
        console.log("hello,我是" + this.name);
    }
}
const p = new Person();
/*
* 访问一个对象的原型对象      对象.__proto__
* console.log(Object.getPrototypeOf(对象));

* */
console.log(p.__proto__);//{constructor: ƒ, sayHello: ƒ}
console.log(Object.getPrototypeOf(p));//{constructor: ƒ, sayHello: ƒ}
|


原型的作用; 原型就相当于是一个公共的区域,可以被所有该类实例访问
可以将一个该类实例中所有的公共属性统一存储到原型中
这样我们只需要创建一个属性,即可被所有实例访问
prototype
1
2
3
4
5
6
7
8
|
class Person {
    sayHello(){
        console.log("hello")
    }
}
const p1 = new Person();
console.log(Person.prototype);
console.log(Person.prototype === p1.__proto__); //true
|
 可以通过上面两种方式完成类的修改
Object.hasOwn用法
用来检查一个对象的自身是否含有某个属性
MDN文档-Object.hasOwn
1
2
3
4
5
6
|
class Man {
    name = "liming";
}

const man1 = new Man();
console.log(Object.hasOwn(man1, "name")) //true
|
旧类
早期js中,直接通过函数来定义类
一个函数如果直接调用xx(),那么这个函数就是一个普通函数
一个函数如果通过调用new xxx()那么这个函数就是一个构造函数
1
2
3
4
|
function Person (){

}
const p = new Person();
|
上面的等价于下面的
1
2
3
4
|
class Person {

}
const p = new Person();
|
 1
 2
 3
 4
 5
 6
 7
 8
 9
10
11
12
13
14
15
16
17
18
|
function Person(name,age){
    //构造函数里面写的内容就是class中constructor写的内容
    this.name = name;
    this.age = age;
    this.sayHello = function (){
        console.log("hello")
    }
}
//向原型中添加
Person.prototype.sayNice = function (){
    console.log("nice")
}
const p = new Person("meowrain",12);
console.log(p.name); // meowrain
console.log(p.age); // 12
p.sayHello(); //hello
p.sayNice();//nice
console.log(p);
|
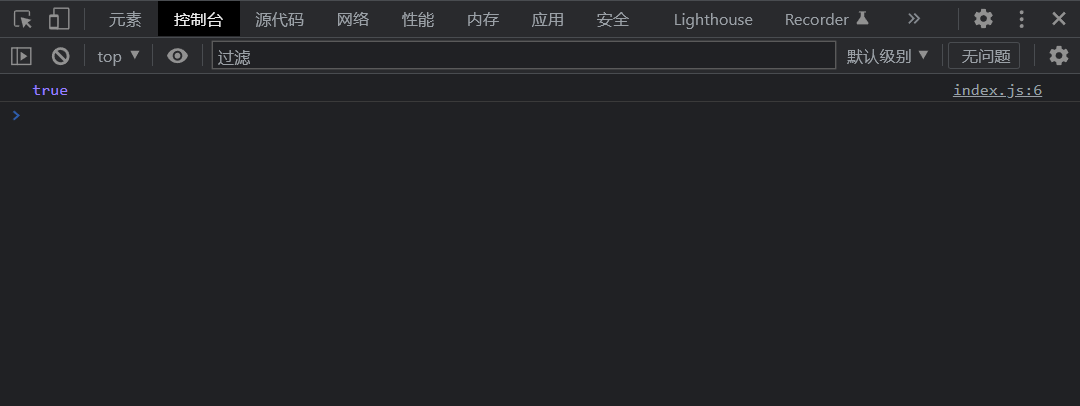
 如上图,从上图我们可以看到,sayNice方法被添加到原型中了
旧类静态属性,静态方法…
 1
 2
 3
 4
 5
 6
 7
 8
 9
10
11
12
13
14
15
16
17
18
19
20
21
22
23
24
25
26
27
|
var Person = (
    function () {
        //构造函数
        function Person(name, age) {
            this.name = name;
            this.age = age;
        }

        //静态属性
        Person.staticProperty = "hobby";
        Person.hobby = "nice";
        console.log(Person.hobby);//nice

        //静态方法
        Person.staticMethod = function () {
            console.log("good");
        };
        Person.staticMethod(); // good

        //创建实例
        const p = new Person("meowrain", 12);
        console.log(p.name);
        console.log(p.age);

        //返回对象
        return Person;
    })();
|
继承:
 1
 2
 3
 4
 5
 6
 7
 8
 9
10
11
12
13
14
15
16
17
18
19
20
|
var Animal = (function () {
    function Animal(name, age) {
        this.name = name;
        this.age = age;
    }

    return Animal;
})();
var Cat = (function () {
    function Cat(name, age) {
        this.name = name;
        this.age = age;
    }

    //继承Animal
    Cat.prototype = new Animal();
    return Cat;
})();
const cat1 = new Cat("meow", 2);
console.log(cat1);
|
new运算符
new运算符是创建对象时候使用的运算符
new运算符-MDN docs


 可以通过上面两种方式完成类的修改
 如上图,从上图我们可以看到,sayNice方法被添加到原型中了

